Enabling Baremetal Multiprocessor Code on Qualcomm Dragonboard 410C
Ever since the initial product development milestones of STING were met, I have been trying to enable it on a real silicon. Lot of 64-bit ARMv8 based systems/boards have released in last few quarters. We selected Qualcomm Dragonboard 410C for the bringup activity as it would give an access to 64-bit ARMv8 CPUs in addition to other peripherals which can then be enabled in STING. I was able to boot STING on the Dragonboard, and faced a number of challenges. I am documenting it all in this blog so that anyone who wants to write and run their own baremetal app/OS may find it easier to do so after reading this.
Board Details
Qualcomm Dragonboard 410C is a credit card sized development board based on Qualcomm Snapdragon 400 series processor for IoT and embedded applications. This board has quad core Cortex-A53 processor and 1GB RAM and number of other powerful peripherals.
You can find more information about the board at the 96boards website.
Prelim
In this blog, I will be showing how to write a baremetal code for the Qualcomm Dragonboard 410C, load it to address 0x9000_0000 and set PC (program counter) of all the four CPUs to that address.
The code at 0x9000_000 will print the string “Hello World” on the serial console. To load the image to 0x9000_0000 and to release the cpus at that address we use u-boot. We use tftpboot command in u-boot to load the image. To load u-boot itself, we use fastboot.
Setting up the Board
To setup the board, you need the following :
-
UART to USB adapter cable. The one I have with me is this : http://usb2serialcables.com/product/dragonboard-410c-uart-to-usb-adapter-cable/
The link has details on how to connect it to the board. I have had success with other UART to USB adapter cables too, but they were a bit more cumbersome to setup.
-
In addition to the UART to USB adapter cable, you will need Miniusb cable to load u-boot via fastboot.
-
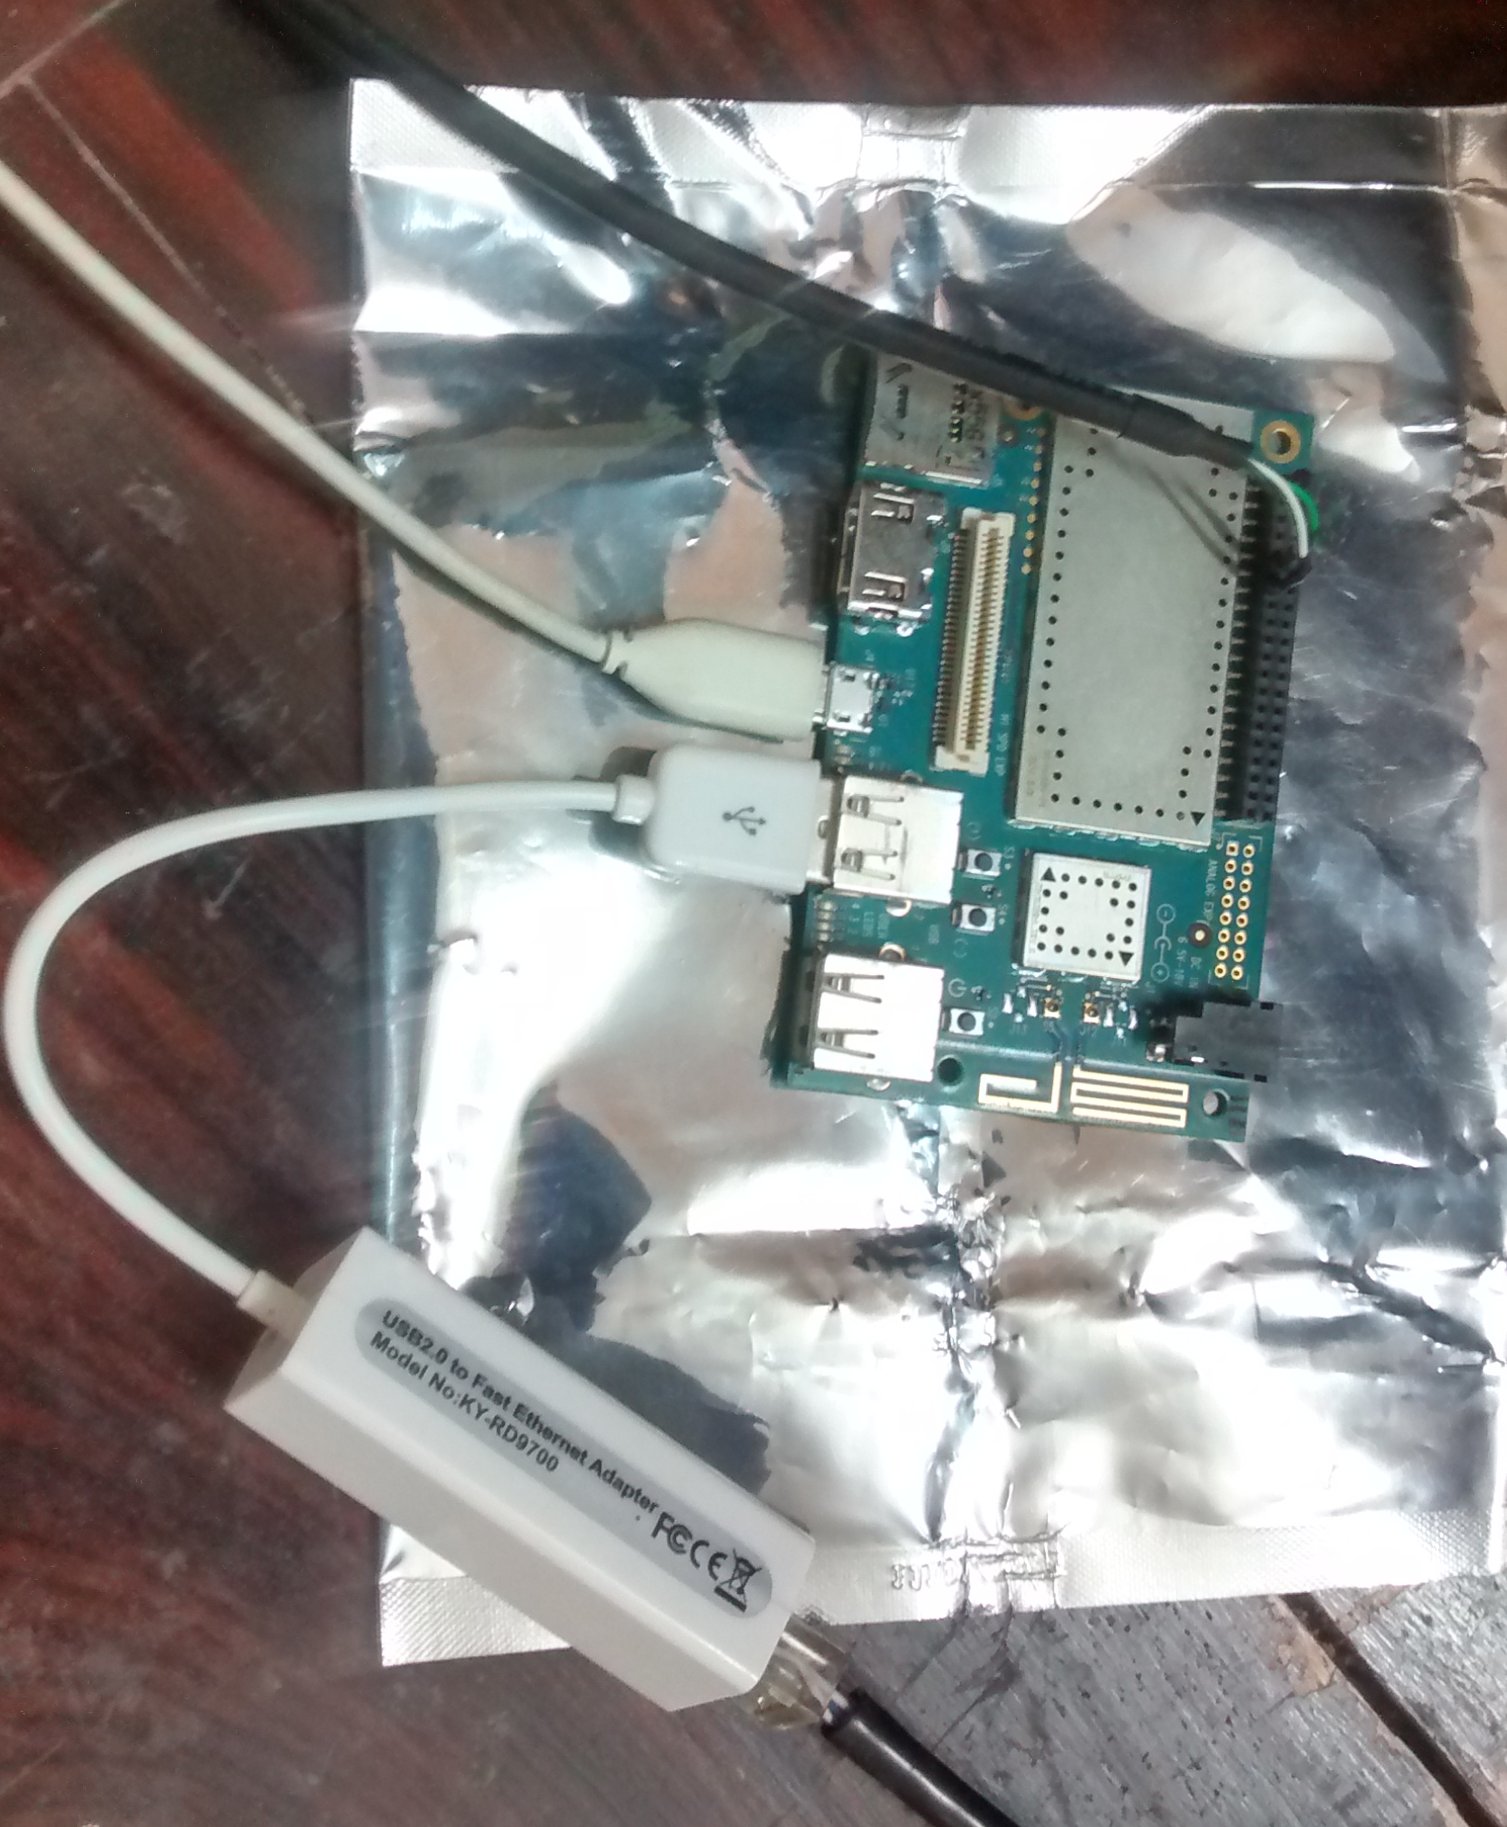
To load our baremetal code via tftp, we need a way to connect the board to the ethernet. To connect it to ethernet we can use the usb to ethernet adapters. The one I have is:
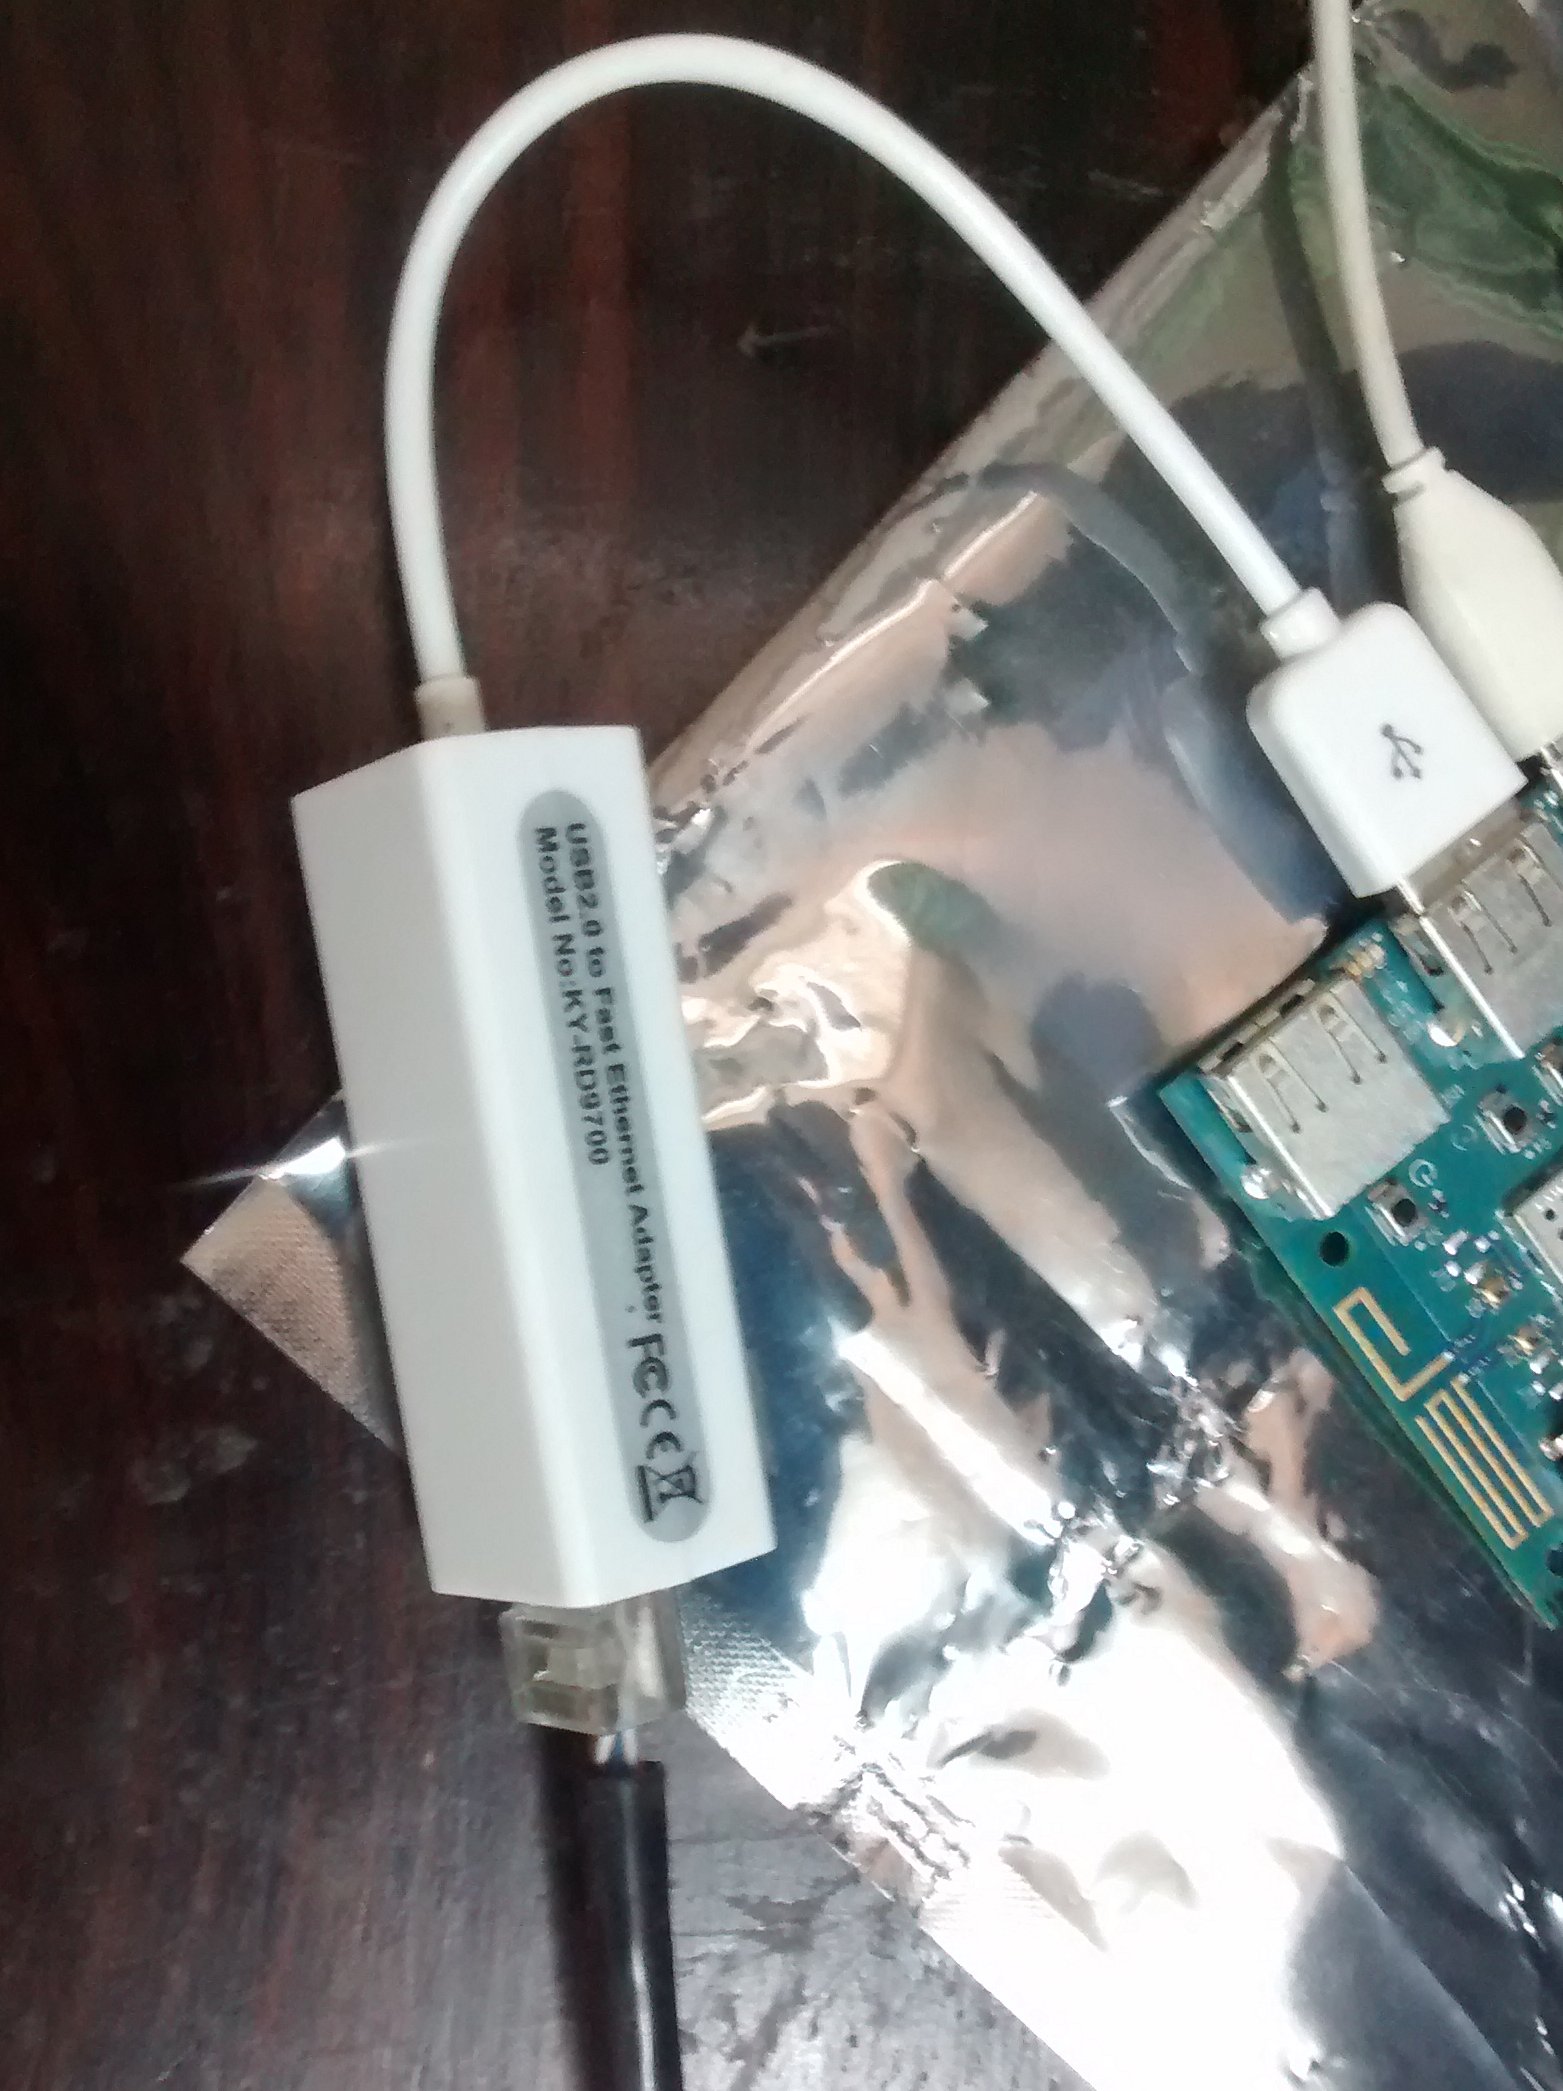
I got this adapter from a local shop and it turned out to be DM9601 based device. The u-boot luckily had support for DM9601 based device, but the vendor id and product id of this device were different from what u-boot expected. Adding the vendorid and device id to the list of supported devices in the u-boot code got it working.
To find the vendorid and the product id of the adapter, just stick it into your linux host and run the command
lsusb
This is the output I got
$ lsusb
Bus 001 Device 005: ID 0fe6:9700 Kontron (Industrial Computer Source / ICS Advent) DM9601 Fast Ethernet Adapter
Bus 001 Device 003: ID 05e3:0608 Genesys Logic, Inc. Hub
Bus 001 Device 001: ID 1d6b:0002 Linux Foundation 2.0 root hub
Bus 005 Device 001: ID 1d6b:0001 Linux Foundation 1.1 root hub
Bus 004 Device 001: ID 1d6b:0001 Linux Foundation 1.1 root hub
Bus 003 Device 002: ID 067b:2303 Prolific Technology, Inc. PL2303 Serial Port
Bus 003 Device 001: ID 1d6b:0001 Linux Foundation 1.1 root hub
Bus 002 Device 002: ID 1532:0029 Razer USA, Ltd
Bus 002 Device 001: ID 1d6b:0001 Linux Foundation 1.1 root hub
The changes to u-boot can be found here: https://github.com/sthiruva/u-boot
This is a fork of: https://github.com/hallor/u-boot
See https://www.96boards.org/forums/topic/u-boot-support-for-dragonboard410c/ for more information.
Here is the picture of the board after connecting all the cables and adapter
Minicom Setup
Once the board has been setup, the UART cable needs to be connected to the GPIO pins on the Dragonboard and the USB end to the host machine. Use a serial communication client to connect to the serial port. The client I used is Minicom. In the client disable hardware and software flow control.
The command to start Minicom is:
$ sudo minicom -D /dev/ttyUSB0
The Minicom default file content is:
$ cat ~/.minirc.dfl
# Machine-generated file - use setup menu in Minicom to change parameters.
pu rtscts           No
pu xonxoff          No
Baremetal Code – Checkout and Compile
I have developed a simple baremetal multiprocessor code for the benefit of the user. The source code is shared at : https://github.com/sthiruva/dragonboard_bm
If you do not have GCC for AArch64 compiler, you can obtain it using the tool setup script in the checkout.
The script is located at $ROOT/tools/setup_tool.sh. Running the command
$ cd tools
$ sh setup_tool.sh
Once the command has completed, you can source the dotbashrc file in the $ROOT directory to add the compiler to your PATH.
$ cd ..
$ source dotbashrc
Once you have the compiler on your path, run the shell script build.sh to compile the baremetal code.
Compiling and Loading u-boot
Details on how to compile and load u-boot for Dragonboard can be found in the file dragonboard.txt in the top of the u-boot checkout.
Once u-boot boots, you should see something like this
U-Boot 2016.01-rc1-00001-ged4d04d-dirty (Feb 23 2016 - 13:53:10 +0530)
Qualcomm-DragonBoard 410C

DRAM:  986 MiB
MMC:   msm_sdhci: 0, msm_sdhci: 1
Using default environment

In:    serial
Out:   serial
Err:   serial
Net:   Net Initialization Skipped
No ethernet found.
=>
Loading the Baremetal Image
To load the baremetal code, we need a tftp server. In addition to that, the board needs to be assigned an IP address.
Using the env command, set the ipaddr and serveraddr variable. For example:
=> env set ipaddr 192.168.1.101
=> env set serveraddr 192.168.101
You could also set it u-boot/include/configs/dragonboard.h so that you do not have to execute it at every boot.
Once u-boot has been loaded, run the following commands at the command prompt to load the baremetal image.
=> icache off
=> dcache off
=> usb start                            # This should detect the usb ethernet adapter
=> sleep 1
=> mw.b 0x90000000 0x0 0x200000         # Clear about 2Megs @0x90000000
=> tftpboot 0x90000000 bm.bin           # Load the baremetal bin image to 0x90000000
=> usb stop
Again, you do not have to execute this every boot, you can set it in the include/configs/dragonboard.h and avoid some typing!
Jumping to the Baremetal Code
When the u-boot code execute, only one cpu is woken up, all the other CPUs are held elsewhere. In order to wake the secondary cpus, there are a number of things that need to be done. You need to execute a secure monitor call, and also write to a number of registers. Most of the code for that is available in the Linux sources. I have adapted the code and included into the u-boot sources. These files are in: drivers/soc/qcom
In order to wake up the secondary cpus, a new command ssa has been added. This calls the driver code and wakes up the cpu and places at the location required by the user.
In our case, the location is 0x9000_0000. Once the secondary cpus are awake, send the primary cpu also to the same location.
ssa 0x90000000
go  0x90000000
Once the command has completed, you should see “Hello World” prints from all the cpus.
Output
Here is the output you will get on running the baremetal code:
=> icache off
=> dcache off
=> usb start
starting USB...
USB0:   USB EHCI 1.00
scanning bus 0 for devices... 3 USB Device(s) found
       scanning usb for storage devices... 0 Storage Device(s) found
       scanning usb for ethernet devices...
Warning: dm96010 using MAC address from net device
1 Ethernet Device(s) found
=> mw.b 0x90000000 0x0 0x200000
=> tftpboot 0x90000000 bm.bin
Link detected.
Using dm96010 device
TFTP from server 192.168.1.100; our IP address is 192.168.1.101
Filename 'bm.bin'.
Load address: 0x90000000
Loading: ##
         285.2 KiB/s
done
EHCI timed out on TD - token=0x8008d80
T Bytes transferred = 28672 (7000 hex)
=> usb stop
stopping USB..
=> ssa 0x90000000
cpu0: Hello World!
cpu1: Hello World!
cpu2: Hello World!

=> go 0x90000000
## Starting application at 0x90000000 ...
cpu3: Hello World!
The bare metal code does not implement any locks, so we use a message passing mechanism to make sure that the write by one cpu to the uart does not clobber the output of other cpus
Conclusion
The Dragonboard is an wonderful little device. Booting STING on the dragonboard has been very instructive. Having booted STING, we wanted to share the details of how we achieved it. Hope this helps those of you who are looking to boot a baremetal kernel on the Qualcomm Dragonboard 410C. Feel free to contact me in case you have any questions/doubts.
Categories: programming
Subscribe
Subscribe to this blog via RSS.
Categories
General 5
Reports 1
Recent Posts
Importance of Software Driven Functional Verification Methodology
Posted on 05 Sep 2020Using STING Release Packages for Verifying RISC-V Implementations
Posted on 25 Oct 2019